If there’s one thing any self-respecting developer will do, it’s try and build a feature for their blog over actually writing something. So I’ve created myself a bit of a trap. I’ve built a nice little feature for my website, and now I’m going to write about it.
I really like Open Graph preview cards. Here’s an example from Brian Lovin:
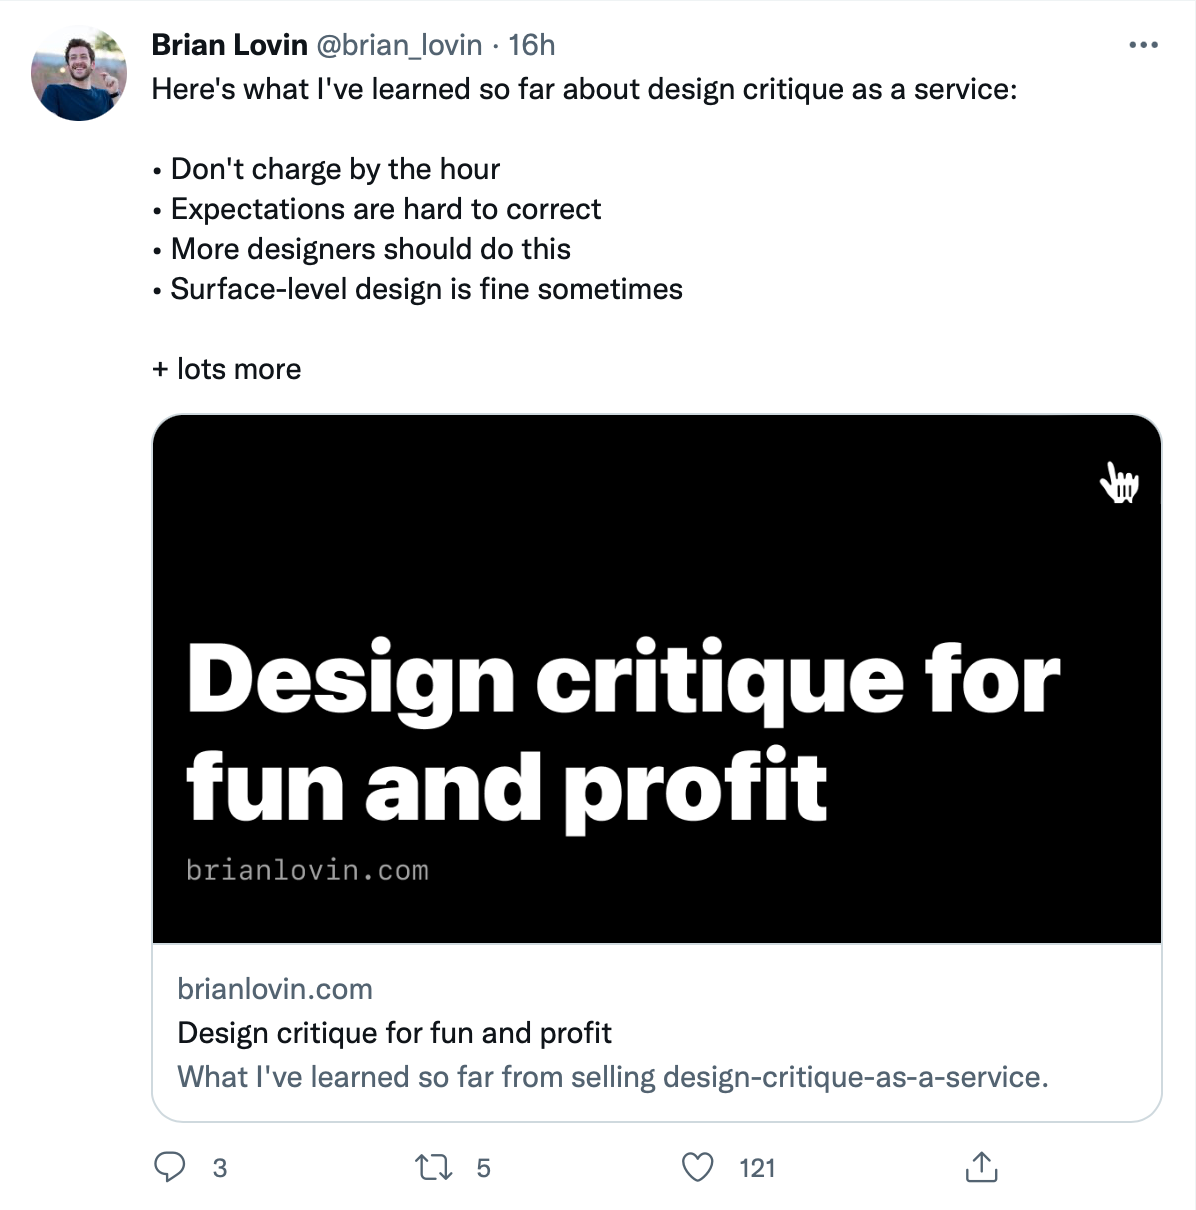
Brian individually creates those images (for pages). I wanted to create them for blog posts, but I knew that manually creating them for the vast amount of content I produce just wasn’t going to be feasible – I’d need to automate it.
Here’s a breakdown of what I’m going to cover:
- What is Open Graph?
- Building an Open Graph preview as a React component
- Creating an image from the React component with Puppeteer
- Querying the image
What is Open Graph?
Firstly, let’s take a step back. What is Open Graph? Open Graph is a protocol created by Facebook for standardising metadata from webpages so it can be leveraged in other apps.
Think about when you post a link in a Tweet. A preview pops up. This often includes additional information, from a title, brief description and additional content like an image or video. This allows for a much richer experience for users that’s more likely to result in a click – and isn’t that what the internet is about really? More clicks?
Practically, this means that we have some additional metadata in our <head> like this.
<meta property="og:title" content="My Blog Post" />
<meta property="og:type" content="article" />
<meta property="og:url" content="https://jonathandavi.es/" />
<meta property="og:image" content="https://jonathandavi.es/preview-image" />
Then when I paste a link into Twitter (or Slack, Facebook etc) these meta items are going to be queried and saved. I’m only going to focus on the image element for this note. The Open Graph website does a good job of explaining all the different properties available.
Building an Open Graph Preview as a React Component
I started off by simply creating a React component. Thanks to Tailwind CSS I was able to design it at pretty much at the speed of thought. For now the implementation is pretty simple. I’m only pulling through title, date and slug but I could easily add an image, or the tags from the post.
One thing I’m doing is explicitly setting the width and height to 1200px and 630px respectively. This is purely down to what Twitter recommends so it doesn’t start cropping things.
function OpenGraphImage({ title, date, slug }) {
  return (
    <div className="relative flex h-[630px] w-[1200px] flex-col justify-between overflow-hidden bg-gradient-to-br from-rose-300 to-pink-400 p-24">
      <div className="">
        <h1 className="font-heading text-6xl font-bold text-slate-800 underline decoration-pink-500">
          {title}
        </h1>
        <p className="mt-6 font-heading text-3xl font-semibold text-slate-800">
          {date}
        </p>
      </div>

      <div className="flex items-center self-start rounded-lg bg-white/40 px-6 py-2 font-mono text-2xl">
        <LinkIcon className="mr-2 h-7 w-7 text-pink-500" />
        <span className="text-slate-800">jonathandavi.es</span>
        <span className="text-slate-700">/{slug}</span>
      </div>
      <BgImage className="absolute right-0 translate-x-1/2 translate-y-1/3 transform opacity-20" />
    </div>
  );
}
I’m then going to display this on a page. Using NextJS’s file-system based routing and useRouter hook to get the props from the URL:
// pages/open-graph-card-image.js

import { useRouter } from "next/router";

export default function OpenGraphCardImage() {
  const router = useRouter();
  const { title, date, slug } = router.query;
  return <OpenGraphImage title={title} date={date} slug={slug} />;
}
So I can now go to http://localhost:3000/open-graph-card-image?title=my%20title&date=6%20Feb,%202022&slug=my-new-post and get this:

But this is still just rendered HTML at the moment, the next step is to create an image from it.
Creating an Image with Puppeteer and a Serverless Function
This was my first time using Vercel’s serverless functions. Broadly, you have a request object where you can get any info you need for your action, and then a response object which you can populate with the results of what you’ve done.
// pages/api/index.js

export default function handler(request, response) {
	const { title } = request.query
	// do something like generate a screenshot
	return response.body(something)
  });
}
So here’s what we’re going to want to do:
- Get the parameters for generating the image (title, date, slug)
- Visit our
/open-graph-card-imageendpoint - Take a screenshot of what’s on that page
- Return the image as part of our API response.
To do this, we can use Puppeteer. Puppeteer allows us to spin up an instance of Chrome and control it. It has lots of cool features, like generating PDFs from HTML and for our use case: generating images.
The most important thing for us is going to be environmental differences between developing locally and when this endpoint is running on the serverless function. In development, we want to use our local install of Chrome, while on the serverless function we want to use headless-chrome.
This difference can be managed with an options object that we can pass into Puppeteer:
import chrome from "chrome-aws-lambda";

// Local path to Google Chrome on my Mac
const exePath = "/Applications/Google Chrome.app/Contents/MacOS/Google Chrome";

const isDev = process.env.NODE_ENV === "development";

export const getOptions = async (isDev) => {
  if (isDev) {
    return {
      args: [],
      executablePath: exePath,
      headless: true, // we can toggle this to watch locally
    };
  } else {
    return {
      args: chrome.args,
      executablePath: await chrome.executablePath,
      headless: chrome.headless,
    };
  }
};
Now let’s setup Puppeteer to got to a URL and take a screenshot with a getScreenshot function:
import puppeteer from "puppeteer-core";

export const getScreenshot = async (url, isDev) => {
  const options = await getOptions(isDev);
  const browser = await puppeteer.launch(options);
  const page = await browser.newPage();

  await page.setViewport({
    width: 1200,
    height: 630,
    deviceScaleFactor: 2,
  });

  await page.goto(url, { waitUntil: "load" });

  const file = await page.screenshot({
    fullPage: true,
    type: "png",
  });

  await page.close();
  await browser.close();

  return file;
};
The code is pretty self explanatory. We’re creating a Puppeteer instance with our options depending on the environment. Setting the page dimensions and scale factor, visiting the URL we pass in and once the page is loaded, taking a screenshot and returning it.
Let’s now hook getScreenshot into an API Endpoint:
// /pages/api/og-image.js

const rootUrl = isDev
  ? "http://localhost:3000"
  : `https://${process.env.VERCEL_URL}`;

export default async function handler(req, res) {
  const { title, date, slug } = req.query;
  try {
    const file = await getScreenshot(
      `${rootUrl}/og-card-image?title=${title}&date=${date}&slug=${slug}`
    );
    res.statusCode = 200;
    res.setHeader("Content-Type", "image/png");
    res.end(file);
  } catch (error) {
    res.statusCode = 500;
    res.setHeader("Content-Type", "text/html");
    res.end(`<p>Sorry, an error occurred ${error.message}.</p>`);
  }
}
Querying the Image
My biggest concern going into this was how I was going to generate and save the images. Do I need a build task to loop through all the posts, generate the images, and save them up to somewhere and then embed the links into each note?
That sounds like a lot of work 😵💫
Let’s break down what actually needs to happen and how it fits into the overall flow.
- I post a tweet with the blog post url
- Twitter looks at the link’s meta tags
- Twitter visits the image link url
- Twitter saves the image at that link
Why do we need to save and cache the images when the Open Graph consumers are going to do that anyway? The main thing that I’d have to be careful about is working within the pricing structure for the serverless functions if all of a sudden a lot of open graph previews are being generated. I don’t see this as a problem for now.
So now all we have to do is add the Serverless API Endpoint to the <head>, and pull in the note params:
// pages/notes/[slug].js

<Head>
  <meta
    property="og:image"
    content={`${rootUrl}/api/og-image?title=${encodeURI(note.title)}&url=${
      note.realSlug
    }&date=${encodeURI(note.displayDate)}`}
  />
</Head>
(I’m encoding the strings to deal with the spaces)
Conclusion & Next Steps
So at this point we have a pretty nice initial solution for generating dynamic Open Graph images.
What I don’t love about this implementation is that I have this extra /og-card-image route. It’s not doing any harm, but it’s untidy. For now though, I’m happy to accept it as a trade-off for easily access to Tailwind styles and my fonts through my layout. Alternatively I could have cut out the local routing and generated the entire HTML body – see Leigh Halliday’s example for this.
Further Reading / Viewing
- Wes Bos’ video setting up dynamic previews with Gatsby and Netlify Lambdas
- Leigh Halliday’s example of generating images with Puppeteer
Things to improve
- I don’t love that I’m passing all these props around (note -> api endpoint -> image page)
- Generate HTML programatically apposed to having an open pages endpoint.
- Randomised gradient backgrounds
- Add note tags to image
- More flexible images (use browser window to do this)
- Generate and cache images on deploy